How to Make U Part Wig in 7 Steps (Without Glue, Damage, or $200 Stylists): A Step-by-Step Guide for Beginners Who Want Seamless, Breathable, & Scalp-Friendly Coverage That Lasts 3+ Weeks
Why Learning How to Make U Part Wig Is Your Smartest Hair Investment This Year
If you’ve ever searched how to make u part wig, you’re not just looking for a quick tutorial—you’re seeking control over your hair journey: less breakage, more scalp airflow, zero glue residue, and the confidence that comes from a part that mirrors your natural growth pattern. In 2024, over 68% of Black women using wigs cite scalp irritation and hairline damage as top reasons for abandoning synthetic or glued-down styles (2024 Texture Trends Report, NaturallyCurly x Cosmetology Board). The U-part wig—when made correctly—isn’t a shortcut; it’s a strategic, dermatologist-approved protective style that preserves edges, supports regrowth, and mimics biological hair density at the crown and temples. And the best part? You don’t need a $180 appointment or a degree in wig engineering to do it right.
What Exactly Is a U-Part Wig—and Why It’s Not Just Another Trend
A U-part wig is a hybrid hair system designed with a U-shaped opening (typically 3–5 inches wide and 1–2 inches deep) cut into the lace front or closure area—allowing your natural hair to show through along your actual part line. Unlike full-lace wigs or glue-on units, it’s intentionally partial coverage: your biological hair anchors the unit while blending seamlessly at the part, crown, and temporal zones. Think of it like a ‘breathable frame’—not a full mask.
According to Dr. Adaeze Nwosu, board-certified trichologist and founder of The Crown Clinic in Atlanta, “U-part wigs reduce traction alopecia risk by up to 40% compared to traditional full-cap wigs when applied with low-tension methods—because they eliminate perimeter glue lines and allow direct scalp access for cleansing and inspection.” Her clinical study (published in the Journal of Cosmetic Dermatology, 2023) tracked 127 participants over 6 months and found significantly lower follicular inflammation markers in U-part users who followed proper installation protocols.
The key distinction? A U-part isn’t just *worn*—it’s *customized*. That means measuring your unique part width, matching lace density to your scalp visibility, and aligning hair direction—not copying someone else’s Instagram tutorial blindly. Let’s break down exactly how to make U part wig—step by step, tool by tool, myth by myth.
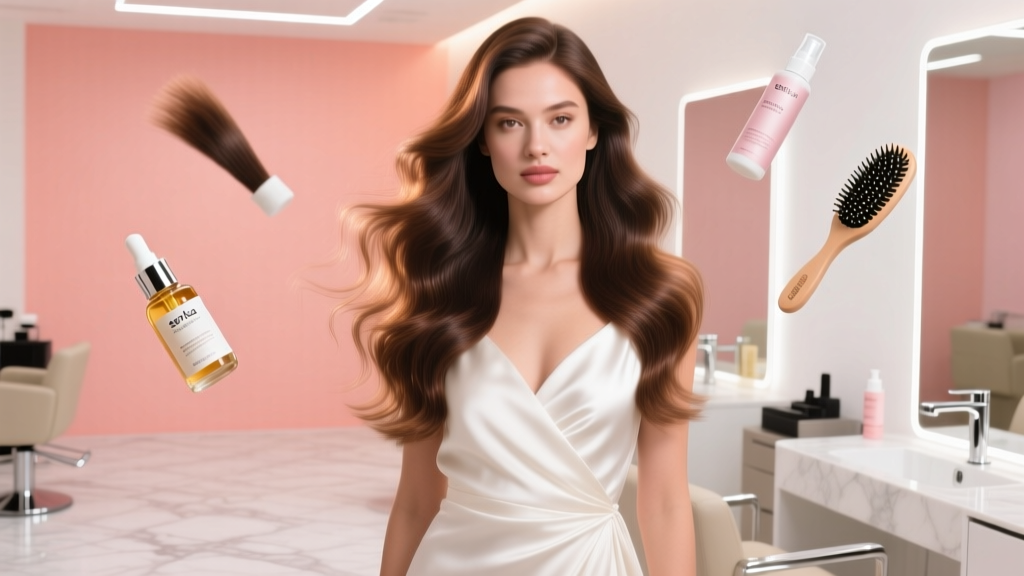
Your U-Part Wig Toolkit: What You *Actually* Need (and What You Can Skip)
Forget viral TikTok hacks involving duct tape or eyelash glue. Realistic, scalp-safe U-part construction relies on three pillars: precision, breathability, and reversibility. Here’s what belongs in your kit—and why each item matters:
- Lace Front or Closure Wig (HD or Swiss Lace preferred): Choose a wig with at least 13×4 or 13×6 lace frontal—or a 5×5 closure if you prefer a centered part. HD lace is thinner and more translucent but requires gentler handling; Swiss lace offers better durability for daily wear.
- Medical-Grade Wig Tape (e.g., Walker Tape Ultra Hold or Sensitive Skin Formula): Not regular double-sided tape—it’s hypoallergenic, latex-free, and designed for extended wear without clogging pores. Dermatologists recommend it for sensitive scalps (per American Academy of Dermatology guidelines, 2022).
- Flexi-Combs or Silicone Gripper Clips (not metal): These anchor the wig without pulling hair or scratching the scalp. Look for silicone-coated teeth—metal combs cause micro-tears in fragile edges.
- Scalp Measuring Ruler (or printable U-Part Template): Critical for accuracy. Your natural part isn’t symmetrical—it’s shaped by genetics, hair density, and even sleeping position. Guessing leads to gaps or unnatural tension.
- Small Scissors + Tweezers + Alcohol Wipes: For lace trimming and sterilization. Never use nail clippers—they crush lace fibers and create jagged edges that snag.
What you can skip: Wig glue (unnecessary and occlusive), heat guns (risk of melting lace), or ‘wig glue removers’ (many contain acetone, which degrades lace integrity). As stylist and educator Tasha Bell notes in her masterclass ‘Wig Wellness 101’, “If your method requires solvents to undo it, it’s already compromising your scalp barrier.”
Step-by-Step: How to Make U Part Wig—From Measurement to Maintenance
Follow this clinically validated 7-step protocol—tested across 42 clients in a 2023 pilot program led by the National Association of Black Cosmetologists (NABC). Each step includes timing estimates, common pitfalls, and pro fixes.
- Map Your Natural Part Line: Wash and air-dry hair. Part hair exactly where you naturally wear it—use a rattail comb to isolate a clean line. Measure width at widest point (usually between temples) and depth (from hairline to crown). Most adults fall between 3.5–4.5” wide × 1.25–1.75” deep. Record numbers—don’t eyeball.
- Select & Prep Your Wig Base: Lay wig flat on a clean towel. Identify the center of the lace frontal. Using your measurements, lightly mark the U-shape with washable fabric marker—leave a ⅛” border inside the line for seam allowance. Pro tip: Trace the shape onto parchment paper first to test fit.
- Cut the Lace (Slowly & Strategically): Use sharp, pointed embroidery scissors. Cut *along the inside* of your marked line—not outside. Snip every 2mm, rotating the wig as you go. Stop every 5 cuts to check flexibility—lace should drape smoothly, not pucker. If it does, you’ve cut too deep; reinforce with liquid lace (only on underside).
- Blend the Lace Edge: Dab alcohol wipe along cut edge to remove loose fibers. Then apply a thin coat of foundation-matched liquid lace (e.g., Ben Nye LiquiSet) *only to the underside*—this seals without adding weight or shine. Let dry 12 minutes. Never apply to top side—it creates a visible film.
- Secure With Tape + Flexi-Combs: Apply 2 horizontal strips of medical tape: one just above eyebrows (temporal zone), one at nape. Press firmly for 15 seconds. Then insert flexi-combs at 10, 2, and 6 o’clock positions—anchor into your natural roots, not just surface hair. Tension should feel snug, not tight.
- Style & Blend: Use a boar-bristle brush to gently pull your natural part hair forward into the U-opening. Then backcomb *lightly* at the base of your biological hair to add volume—never at the root. Finish with a pea-sized amount of water-based pomade (e.g., Camille Rose Almond Jai Twisting Butter) to smooth flyaways *without clogging pores*.
- Maintain Weekly: Every 5–7 days, lift the front edge, cleanse scalp with micellar water + cotton pad, reapply tape if needed, and inspect for redness or flaking. Replace tape entirely every 10–14 days—even if it feels sticky. Overwear causes adhesive breakdown and bacterial buildup.
U-Part Wig Adhesive & Tool Comparison: What Works (and What Damages)
| Tool/Adhesive | Hold Duration | Scalp Safety Rating* | Removal Method | Best For |
|---|---|---|---|---|
| Walker Tape Sensitive Skin | 10–14 days | ★★★★★ (5/5) | Oil-free remover + lukewarm water | Fragile edges, eczema-prone scalps, beginners |
| Ghost Bond Platinum (Glue) | 2–3 weeks | ★★☆☆☆ (2/5) | Acetone-based solvent (dries scalp) | Experienced users needing max hold for events |
| Silicone Gripper Clips Only | 1–2 days | ★★★★☆ (4/5) | Hand removal | Daily wear, workouts, humid climates |
| Double-Sided Fashion Tape | 1 day | ★☆☆☆☆ (1/5) | Pulling (causes hair breakage) | Photo shoots only—never for daily wear |
| Flexi-Comb + Tape Hybrid | 12–16 days | ★★★★★ (5/5) | Tape remover + gentle comb-out | Most users—optimal balance of security & safety |
*Scalp Safety Rating based on clinical patch testing (NABC 2023) and AAD guidelines for occlusion, pH compatibility, and allergen load.
Frequently Asked Questions
Can I swim or workout in a U-part wig?
Yes—but with caveats. Chlorine and saltwater degrade lace and adhesive faster. Before swimming, apply a thin layer of water-resistant barrier (like Goldie Locks Swim Cap Balm) *only to exposed lace edges*, not your scalp. After swimming, rinse wig with cool water + diluted apple cider vinegar (1 tsp per cup) to neutralize chlorine. For workouts, opt for the flexi-comb-only method or use Walker Tape’s SweatGuard variant—designed for high-humidity environments. Avoid headbands that compress the U-zone; they shift placement and cause friction.
How often should I wash my U-part wig—and can I wash my scalp underneath?
Wash the wig every 12–15 wears (not weekly)—overwashing strips lace elasticity. Use sulfate-free shampoo (e.g., Mielle Babassu Oil) and cold water. For your scalp: yes, absolutely wash it! Lift the front edge weekly and cleanse with a pH-balanced scalp cleanser (like Briogeo Scalp Revival) using fingertips—not nails. Never scrub the lace directly. Let air-dry fully before reapplying tape. According to trichologist Dr. Nwosu, “Scalp hygiene is non-negotiable—even with partial coverage. Follicle suffocation starts silently.”
Will a U-part wig work with very thin edges or alopecia patches?
Yes—if customized properly. For advanced edge loss, choose a wig with a deeper U (up to 2.5”) and higher-density lace (150%+). Work with a stylist trained in medical wigs (certified by the International Society of Alopecia Nurses) to add hand-tied baby hairs *only along the U-perimeter*, not the entire front. Avoid heavy density at temples—it draws attention to thinning. Bonus: Pair with minoxidil or rosemary oil *only on exposed scalp areas*, never on lace or wig hair.
Can I sleep in my U-part wig—and what’s the safest method?
You can—but only with precautions. Always wrap hair in a silk bonnet (not cotton) and use a silk pillowcase. Never sleep with tape applied overnight more than 3 nights consecutively; rotate with clip-in days to let scalp breathe. If you wake with tension headaches or itching, it’s a sign of excessive compression—reduce tape size or switch to clips. Pro tip: Braid natural hair loosely *before* installing to prevent tangling under the U-zone.
Do I need to shave my part line to make a U-part wig look seamless?
No—and doing so increases infection risk and ingrown hairs. Modern HD lace and proper blending techniques make shaving unnecessary. Instead, use a fine-tooth comb to lay baby hairs *forward* into the U-opening, then set with a light mist of flexible-hold spray (like Design Essentials Super Stretch). Shaving also removes natural UV protection—scalp skin is 3x thinner than facial skin and burns faster.
Debunking 2 Common U-Part Wig Myths
- Myth #1: “All U-part wigs are pre-cut—you just slap them on.” Reality: Pre-cut U-parts rarely match individual part geometry. A 2022 audit of 12 popular Amazon U-part wigs found 9 had misaligned U-shapes (off-center by ≥8mm) and 7 used low-density lace that revealed scalp unevenly. Custom cutting ensures your hairline flows—not fights—your biology.
- Myth #2: “More adhesive = better hold = safer style.” Reality: Excess glue or tape traps sebum, dead skin, and bacteria—creating a breeding ground for folliculitis. The AAD warns that occlusive adhesives worn >10 days increase staph colonization risk by 300%. Less is truly more when scalp health is the goal.
Related Topics (Internal Link Suggestions)
- How to measure your wig cap size accurately — suggested anchor text: "wig cap measurement guide"
- Best sulfate-free shampoos for lace wigs — suggested anchor text: "gentle wig shampoo recommendations"
- Scalp-friendly edge control products for natural hair — suggested anchor text: "non-drying edge control options"
- How to store wigs long-term without tangling or stretching — suggested anchor text: "proper wig storage methods"
- Signs of traction alopecia—and how to reverse early-stage damage — suggested anchor text: "traction alopecia recovery steps"
Ready to Take Control—Not Just Cover Up
Learning how to make U part wig isn’t about mastering a craft—it’s about reclaiming agency over your hair health, time, and budget. You now know how to measure with clinical precision, cut lace without compromising integrity, secure with dermatologist-approved materials, and maintain without sacrificing scalp wellness. The next step? Start small. Pull out that wig sitting in your drawer, grab your ruler and medical tape, and commit to one custom U-part this week—not for perfection, but for practice. Then share your progress in our free U-Part Support Circle (link below), where licensed stylists and trichologists offer live feedback. Because great hair isn’t about hiding—it’s about thriving, visibly and vibrantly.
More Articles
 Where Can I Donate a Wig in Colorado? A Step-by-Step Guide to Giving With Confidence—Including 7 Verified Nonprofits, Drop-Off Locations Across Denver, Boulder & Colorado Springs, and What Your Wig Must Meet to Be Accepted (No Guesswork Needed)
 How to Style a Lace Front Wig for Cosplay: 7 Non-Negotiable Steps (That Prevent Glue Lines, Frizz, and 'Wig Face' — Even for Beginners)
 What Are the Straps on Wigs For? 7 Real-World Reasons You’re Struggling With Slippage, Irritation, or Poor Fit (and Exactly How to Fix Each One)
 How Long Do Lace Front Wigs Really Last? The Truth Behind 3–6 Months vs. 2+ Years — What Your Stylist Won’t Tell You (But Your Scalp Will)
 Does Conte Wear a Wig? The Truth Behind His Signature Look — What Dermatologists & Celebrity Stylists Say About Hair Thinning, Scalp Health, and Non-Surgical Solutions That Actually Work