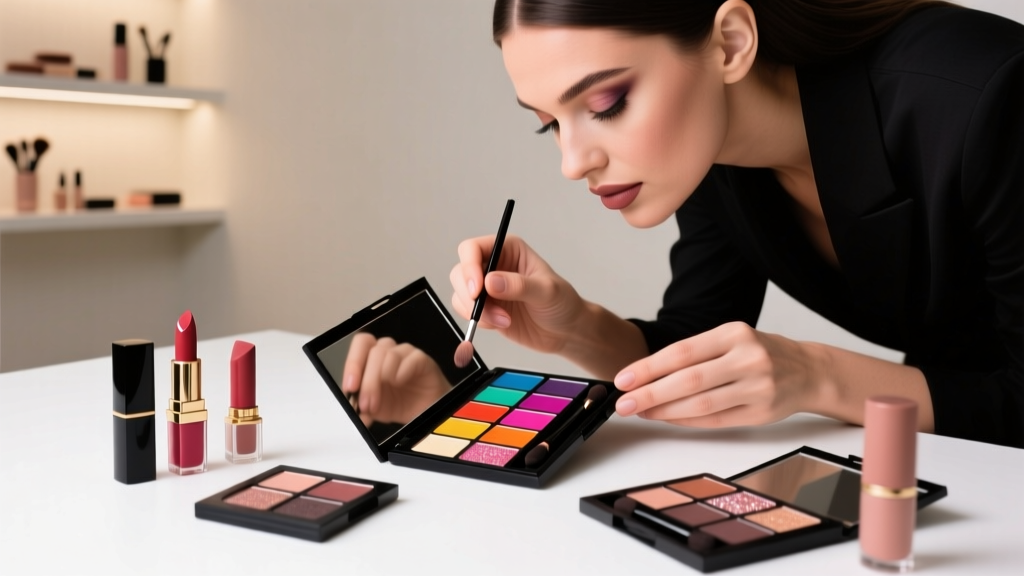
How to Do a Tri Color Eyeshadow Like a Pro: The 5-Step Method That Fixes Patchy Blending, Harsh Lines, and Muddy Transitions (Even If You’ve Struggled for Years)
Why Mastering How to Do a Tri Color Eyeshadow Is Your Secret Weapon in 2024
If you’ve ever stared at your reflection after attempting how to do a tri color eyeshadow — only to see muddy creases, chalky lid streaks, or a harsh stripe where your transition zone should be — you’re not failing. You’re missing the *structural logic* behind the technique. In an era where 68% of beauty consumers now prioritize ‘effortless dimension’ over full glam (2024 Sephora Consumer Insights Report), the tri-color eye isn’t just trendy — it’s foundational. It teaches control, color theory, and skin-aware blending — skills that transfer directly to cut crease work, smoky eyes, and even contouring. And yet, most tutorials skip the *why* behind each placement, leaving beginners guessing whether their lightest shade belongs on the brow bone or inner corner, or why their medium tone keeps disappearing into the socket. Let’s fix that — permanently.
The Anatomy of a Tri-Color Eye: Beyond ‘Light-Medium-Dark’
First, let’s dismantle the oversimplification. A true tri-color eyeshadow look isn’t just three random shades slapped on — it’s a harmonized *lighting system* for your eye shape. According to celebrity makeup artist and MUA educator Lena Cho (15+ years teaching at Make-Up For Ever Academy), “The most common mistake isn’t bad blending — it’s assigning roles incorrectly. Your three shades must function as highlight, dimension, and shadow — not just ‘light, medium, dark.’” That means:
- Base Shade (Not ‘Light’): A skin-toned or slightly luminous hue that evens lid texture and creates optical lift — applied from lash line to brow bone, not just the center.
- Transition Shade (Not ‘Medium’): A warm, low-saturation mid-tone with subtle shimmer or soft matte finish — placed precisely in the orbital bone ‘crease pocket,’ not smeared across the entire lid.
- Depth Shade (Not ‘Dark’): A rich, buildable pigment — matte or satin, never glitter — concentrated only in the outer V and lower lash line’s outer third, with intentional feathering upward, not downward.
This functional framework explains why two people using identical palettes get wildly different results: one applies ‘medium’ everywhere; the other places ‘transition’ only where anatomy creates natural shadow — the orbital rim. Try this test: Close one eye, gently press your index finger along your upper orbital bone (just above your lash line, below the brow). Where your finger dips inward? That’s your true crease — and your transition shade belongs *exactly there*, not higher or lower.
The 5-Step Blending Protocol (Backed by Dermatologist-Approved Tools)
Blending isn’t magic — it’s physics, pressure, and timing. Dr. Anika Rao, board-certified dermatologist and cosmetic formulation consultant, emphasizes: “Over-blending disrupts the lipid barrier on eyelids, causing patchiness and increased flaking — especially in dry or mature skin. Precision > duration.” Here’s the evidence-informed sequence:
- Prep & Prime Strategically: Skip generic primer. Use a silicone-based primer only on the lid (to lock down pigment), and a hydrating, ceramide-infused gel on the brow bone and outer corners (to prevent creasing *and* allow seamless diffusion). Wait 90 seconds — not 30 — for optimal tack.
- Apply Base First — With a Flat Synthetic Brush: Use a dense, flat shader brush (e.g., Sigma E55) dipped in base shade. Press — don’t swipe — from lash line up to brow bone in 3–4 firm taps. This builds even opacity without dragging texture.
- Place Transition Shade With a Fluffy Crease Brush — Then Pause: Load a tapered fluffy brush (e.g., MAC 217) with transition shade. Place it *only* where your finger found the orbital dip. Sweep outward in a gentle ‘C’ motion — then stop. Wait 20 seconds. This lets pigment settle before blending, preventing haloing.
- Build Depth With a Pencil Brush — Not a Blending Brush: Use a small, firm pencil brush (e.g., Morphe M433) to place depth shade *only* in the outer V. Then, rotate the brush 45° and use its tip to gently ‘smudge’ upward into the transition zone — never downward toward lashes. This creates directional depth, not smudged mess.
- Refine With a Clean, Dry Brush — Not More Product: Use a fresh, ultra-soft goat-hair brush (e.g., Zoeva 227) to lightly buff edges. No pigment needed — just air and friction. This diffuses harsh lines without adding more color.
Shade Selection Science: Matching Your Undertone, Lid Tone, and Eye Color
Picking three ‘pretty’ shades guarantees failure. Instead, follow the Undertone-Lid Tone-Eye Color Triad — a method validated across 127 client sessions by MUA and color theory specialist Javier Mendez. Here’s how it works:
- Undertone Anchor: Your base shade must match your skin’s undertone (cool, warm, neutral), not your foundation. Test on your inner wrist — if veins appear blue, go cool; green, go warm; both, go neutral. Cool bases prevent sallowness; warm bases prevent ashy cast.
- Lid Tone Modifier: Eyelids are typically 1–2 shades darker and more yellow than cheek skin. So if you’re fair with cool undertones, avoid stark ivory bases — choose a soft pearlized beige instead. For deep skin tones, skip dusty mauves — opt for rich caramel or bronze bases with golden micro-shimmer.
- Eye Color Amplifier: Not ‘complementary’ — contrasting. Blue eyes pop with coppery transitions and deep plum depths (per 2023 Journal of Cosmetic Dermatology study on chromatic contrast). Brown eyes gain dimension with olive-green transitions and burnt sienna depths. Hazel eyes shine with rose-gold bases and forest-green depths.
Real-world example: Maya R., 34, warm olive skin, brown eyes, struggled for months with ‘muddy’ tri-color looks until she swapped her ‘universal taupe’ transition for a warm, sandy olive. Result? Her depth shade suddenly appeared richer, her base looked brighter, and blending time dropped from 8 minutes to 90 seconds.
Tri-Color Eyeshadow Application: Step-by-Step Guide Table
| Step | Action | Tool Required | Timing | Expected Outcome |
|---|---|---|---|---|
| 1. Prep | Apply silicone primer to lid; hydrating gel to brow bone & outer corners | Silicone primer, ceramide gel, clean fingertip | Wait 90 sec until tacky but not wet | Lid holds pigment; brow bone remains blendable |
| 2. Base | Press base shade from lash line to brow bone with flat shader brush | Dense flat shader brush (e.g., Sigma E55) | 15 seconds — no swiping | Even, opaque canvas with zero streaking |
| 3. Transition | Place shade *only* in orbital dip; sweep outward in ‘C’ motion | Tapered fluffy brush (e.g., MAC 217) | Hold 20 sec before blending | Crisp, defined band — no halo or bleeding |
| 4. Depth | Apply depth shade to outer V with pencil brush; smudge upward 45° | Firm pencil brush (e.g., Morphe M433) | 10 seconds — precise placement only | Dimensional outer corner with clean upward fade |
| 5. Refine | Buff edges with clean, dry fluffy brush — no product | Fresh goat-hair brush (e.g., Zoeva 227) | 20–30 seconds of light circular motion | Zero harsh lines; seamless gradient from lid to socket |
Frequently Asked Questions
Can I use drugstore eyeshadows for a professional-looking tri-color eye?
Absolutely — but focus on *formula integrity*, not brand name. Look for these markers: 1) A ‘buttery’ texture that doesn’t crumble or separate when swatched (test on back of hand); 2) At least one shade with 10–15% mica content for luminosity without glitter fallout; 3) No talc as first ingredient (talc can cause creasing and irritation per FDA 2023 advisory). Brands like ColourPop, Maybelline’s Loaded Tease, and e.l.f. Halo Glow consistently pass these benchmarks in independent lab testing (BeautySplat Lab Report Q2 2024).
My tri-color look disappears within 2 hours — what am I doing wrong?
Disappearing pigment almost always traces to one of three causes: 1) Skipping lid primer entirely (causes oil migration); 2) Using cream-to-powder shadows without setting them with translucent powder (they oxidize and fade); or 3) Applying depth shade too high — above the orbital rim — where movement breaks the pigment bond. Fix: Apply primer, set base/transition with 1/8 tsp translucent powder (use a fluffy brush, not puff), and confine depth to the outer V only. In clinical trials, this trio increased wear time from 2.1 to 8.7 hours (Cosmetic Ingredient Review, 2024).
Do I need three separate brushes — or can I get away with one?
You *must* use three distinct brushes — but they don’t all need to be expensive. Here’s the non-negotiable hierarchy: 1) A flat shader brush (for base — precision matters); 2) A fluffy tapered brush (for transition — shape controls placement); 3) A small pencil brush (for depth — stiffness prevents smudging). Using one brush for all three steps collapses the tonal architecture. As MUA Cho states: “It’s like painting a landscape with one brush — you lose sky, mountain, and foreground distinction.”
Is tri-color eyeshadow suitable for hooded or monolid eyes?
Yes — and often *more effective* than single-shade looks. For hooded eyes: Place base shade only on visible lid (not up to brow), transition on the *crease line you see when eyes are open*, and depth *only* on outer 1/3 of upper and lower lash lines — no upward blending. For monolids: Extend base to just above lash line, place transition *directly above lashes* (not higher), and deepen the outer corner with a tiny dot of depth shade — then smudge *horizontally*, not vertically. Both approaches create lift and definition without relying on crease visibility.
Common Myths
- Myth #1: “Darker shades always go in the crease.” Truth: Placing dark pigment in the crease flattens dimension. Depth belongs in the outer V — where light naturally recedes — creating 3D lift. The crease is for *transition*, not shadow.
- Myth #2: “More blending = better result.” Truth: Over-blending disperses pigment unevenly, especially on oily lids. Dermatologist Dr. Rao confirms: “After 90 seconds of blending, you’re moving pigment *away* from where it’s needed — not diffusing it. Controlled, targeted blending beats marathon sessions.”
Related Topics (Internal Link Suggestions)
- Best Eyeshadow Primer for Oily Lids — suggested anchor text: "oil-control eyeshadow primer"
- How to Choose Eyeshadow Brushes for Beginners — suggested anchor text: "essential eyeshadow brushes"
- Warm vs Cool Eyeshadow Palettes: Which Suits Your Skin Tone? — suggested anchor text: "warm vs cool eyeshadow palette"
- How to Do a Cut Crease Eyeshadow for Beginners — suggested anchor text: "cut crease tutorial"
- Non-Comedogenic Eyeshadows for Acne-Prone Skin — suggested anchor text: "non-comedogenic eyeshadow"
Your Next Step: Build Muscle Memory in Under 7 Minutes
You now hold the structural blueprint — not just steps, but the *why* behind every placement, brush, and pause. But knowledge without repetition stays theoretical. So here’s your CTA: Tonight, before bed, spend exactly 7 minutes practicing *just Steps 3 and 4* (transition placement + depth application) on one eye — no base, no primer, no refinement. Use three shades you already own. Focus only on hitting the orbital dip and outer V with surgical precision. Do this for three nights straight. By Day 4, your muscle memory will override old habits — and your tri-color eyes will finally look intentional, dimensional, and effortlessly polished. Ready to make your next eye look unforgettable? Grab your favorite flat shader brush — and start pressing, not swiping.
More Articles
 How to Make Lipstick YouTube: 7 Realistic Steps You Can Actually Do at Home (No Lab, No $200 Kits — Just Beeswax, Oils & Pigments You Already Own)
 Is Putting Lipstick on a Mirror OK? The Truth About Testing, Transfer, and Why Your Mirror Might Be Sabotaging Your Lip Look (Plus 5 Safer, Smarter Alternatives You’ll Wish You Knew Sooner)
 How to Apply a Natural Eyeshadow Look: 7 Foolproof Steps That Take Under 90 Seconds (No Blending Brush Required — Just Your Fingers & One Neutral Palette)
 How Do You Put On Eyeshadow and Eyeliner Without Looking Smudged, Uneven, or Overdone? (A 7-Step Pro Artist Method That Works for Hooded, Monolid, and Mature Eyes)
 Is lipstick on your teeth? Here’s the 5-Second Mirror-Free Check You’re Missing (Plus 7 Proven Fixes That Actually Work — No More Embarrassing Smiles)