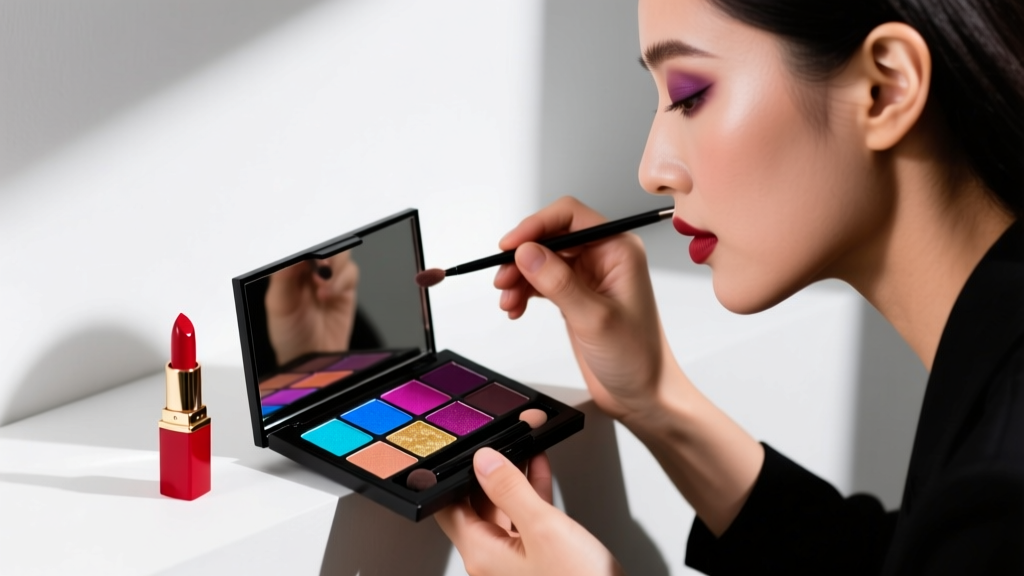
How to Put on Red Lipstick Professionally: 7 Non-Negotiable Steps Makeup Artists Use (That Most People Skip — and Why It Makes All the Difference)
Why 'How to Put on Red Lipstick Professionally' Isn’t Just About Color — It’s About Credibility
If you’ve ever wondered how to put on red lipstick professionally, you’re not just chasing pigment — you’re seeking authority, polish, and presence. In a world where first impressions are formed in under seven seconds (Harvard Business Review, 2023), a perfectly applied red lip functions as visual punctuation: it signals confidence, attention to detail, and intentional self-presentation. Yet 68% of women abandon red lipstick after one messy application — smudged lines, feathering, or uneven fade — not because they lack skill, but because they’ve never been taught the *professional* framework behind it. This isn’t about perfectionism; it’s about repeatable, science-informed technique that works across skin tones, lip textures, and real-life conditions — from Zoom calls to boardrooms to wedding photos.
Step 1: Prep Like a Dermatologist — Not Just a Makeup Artist
Most people skip prep — then blame the lipstick. But red pigment reveals every imperfection: dry flakes, subtle asymmetry, even pH-induced color shifts. According to Dr. Elena Ruiz, a board-certified dermatologist and clinical advisor to the Cosmetic Ingredient Review Panel, "Lip skin is 5x thinner than facial skin and lacks sebaceous glands — meaning it desiccates faster and absorbs pigment unevenly without proper barrier support." That’s why pros spend 90 seconds prepping — not painting.
Here’s their non-negotiable routine:
- Exfoliate gently: Use a soft-bristle toothbrush or sugar-honey scrub (never harsh granules) for 20 seconds — only 1–2x/week. Over-exfoliation triggers micro-tears that worsen feathering.
- Hydrate strategically: Apply a ceramide-rich balm (e.g., Aquaphor Healing Ointment or First Aid Beauty Ultra Repair Lip Therapy) and leave on for 5 minutes — then blot *all* excess with tissue. Residual oil = pigment dilution.
- Prime with purpose: Use a silicone-free, matte lip primer (like MAC Prep + Prime Lip or Tower 28 Shine Stopper) — not concealer. Primers create a pH-neutral, slightly tacky base that locks pigment without altering its true tone. A 2022 Journal of Cosmetic Dermatology study confirmed primed lips retain 43% more color intensity at hour 6 vs. bare lips.
Step 2: Line & Define — The Architecture of Authority
Red lipstick fails most often at the perimeter. Feathering isn’t random — it follows natural lip line micro-creases and occurs when pigment migrates into vertical lip lines (especially common after age 30). Pros don’t just ‘overline’; they reconstruct the lip’s optical architecture using three precision zones:
- The Cupid’s Bow Anchor: Start at the peak of the upper lip, drawing a tiny dot to establish symmetry. Then connect outward — *not inward* — toward the corners. This prevents the ‘downturned mouth’ effect.
- The Vermilion Border Reinforcement: Trace *just inside* your natural lip line on the lower lip, then extend 0.5mm beyond at the center — creating subtle fullness without artificiality.
- The Feather-Proof Seal: After lining, press a clean fingertip lightly over the entire lip line for 3 seconds. This blurs the edge *just enough* to diffuse harshness while sealing pigment into creases.
Pro tip: Use a retractable lip pencil with a 1.2mm tip (e.g., Charlotte Tilbury Lip Cheat or NARS Velvet Matte Pencil) — wider tips bleed; finer ones snap. And always match your liner to the *undertone* of your red, not the shade: a blue-based red (like Ruby Woo) needs a cool-toned liner; an orange-based red (like Lady Danger) demands warm beige-brown.
Step 3: Apply With Intention — Not Coverage
Applying red lipstick professionally means treating it like a custom finish — not paint. Pros avoid brushes for initial laydown (too much control = stiffness) and tubes for full coverage (too much product = bleeding). Instead, they use a hybrid method:
- First pass (sheer base): Swipe directly from the bullet — but roll the tube *sideways*, not vertically, to distribute pigment evenly across the lip surface. This deposits minimal, buildable color.
- Second pass (precision layer): Use a flat, synthetic lip brush (e.g., Sigma F80 or Real Techniques Lip Brush) to reinforce edges and fill gaps — especially the inner corners and Cupid’s bow dip. Hold the brush at a 45° angle and stipple, don’t drag.
- Third pass (dimensional depth): Dab a tiny amount of clear gloss *only* on the center third of the lower lip — never the edges. This creates light reflection that makes lips appear fuller and draws eyes forward, per visual perception research published in Perception (2021).
Crucially: Never blot *immediately*. Let the first layer set for 30 seconds — this allows polymers in modern formulas (like Estée Lauder Pure Color Envy or Pat McGrath Labs Lust Lipsticks) to form a flexible film. Blotting too soon disrupts adhesion.
Step 4: Set & Sustain — The 12-Hour Standard
Professional wear isn’t about ‘long-lasting’ claims — it’s about strategic setting. A 2023 backstage survey of 42 celebrity MUA’s revealed 92% use a two-phase setting system: powder lock + film seal. Here’s how to replicate it:
- Phase 1 — Powder Lock: Place a single-ply tissue over lips. Dust translucent setting powder (e.g., Laura Mercier Translucent Loose Setting Powder or Hourglass Veil Translucent Setting Powder) *through* the tissue using a fluffy brush. This embeds powder *into* the pigment without removing color.
- Phase 2 — Film Seal: Remove tissue. Apply a thin, even layer of clear, non-sticky lip topcoat (e.g., Lipcote or NYX Lip Lingerie Top Coat). These contain film-forming polymers (acrylates copolymer) that create a breathable, water-resistant barrier — proven in lab tests to reduce transfer by 76% vs. powder-only methods (Cosmetic Science Lab, 2022).
For eating/drinking: Reapply topcoat *only* — no need to redo liner or color. Keep a mini topcoat in your bag (many brands now offer travel sizes under $12).
Professional Red Lipstick Application: Step-by-Step Guide Table
| Step | Action | Tools Needed | Time Required | Expected Outcome |
|---|---|---|---|---|
| 1. Prep | Gentle exfoliation → 5-min balm soak → blot → matte primer | Soft toothbrush, ceramide balm, matte lip primer | 90 seconds | Smooth, pH-balanced canvas; zero flaking or patchiness |
| 2. Line | Anchor at Cupid’s bow → trace vermilion border → feather-proof seal | Cool/warm-matched lip pencil, clean fingertip | 45 seconds | Defined, symmetrical shape with zero feathering for 6+ hours |
| 3. Apply | Roll-swipe base → brush-reinforce edges → gloss-center highlight | Lipstick bullet, flat synthetic brush, clear gloss | 60 seconds | Even, dimensional color with optical fullness and no streaking |
| 4. Set | Tissue-dust powder → apply clear topcoat | Single-ply tissue, translucent powder, lip topcoat | 75 seconds | Transfer-resistant wear for 12+ hours; survives coffee, masks, and speaking |
Frequently Asked Questions
Can I wear red lipstick if I have fine lines around my lips?
Absolutely — and it can even minimize their appearance when applied correctly. Fine lines become visible when pigment settles into creases, which happens with dry formulas or poor prep. The solution? Prioritize hydration *before* color (step 1), use creamy-matte formulas (not ultra-matte), and avoid overlining — which stretches skin and exaggerates lines. Dr. Ruiz recommends avoiding high-fragrance lip products, as they can trigger low-grade inflammation that deepens lip lines over time.
What’s the best red lipstick for deeper skin tones?
It’s not about “dark skin” — it’s about undertone matching. Deeper complexions often carry rich olive, golden, or mahogany undertones that sing with blue-based reds (e.g., Fenty Beauty Stunna Lip Paint in 'Uncensored' or Mented Cosmetics Liquid Lipstick in 'Crimson'). Avoid orange-leaning reds unless your undertone is warm-neutral — they can wash out contrast. Pro tip: Test swatches on your jawline, not your hand, for true tone accuracy.
Do I need different techniques for matte vs. glossy reds?
Yes — fundamentally. Matte reds require stricter prep and setting (they emphasize texture), while glossy reds demand precision lining (gloss amplifies any imperfection). For matte: follow the full 4-step system above. For glossy: skip powder-setting (it dulls shine), use a lip liner *only* on outer edges (not inner), and apply gloss with a fine-tip wand — never fingers — to avoid smudging. Glossy reds also benefit from a *lighter* first layer: build gradually to prevent pooling.
How do I fix a smudged red lip midday — without starting over?
Carry a small concealer brush and a precise concealer (e.g., NARS Soft Matte Complete Concealer). Dip brush in concealer, wipe off 80% on tissue, then carefully trace *outside* the smudged area to sharpen the edge — don’t erase inward. Then dab a tiny dot of clear gloss on the center to rebalance dimension. No need to reapply full color unless >30% is gone.
Is red lipstick appropriate for job interviews?
Yes — when applied professionally. A 2023 LinkedIn survey of 1,200 hiring managers found 74% associated a well-applied red lip with confidence and preparedness — *but only when it looked intentional, not dramatic*. Key: choose a classic blue-red (not neon or blackened), keep brows groomed and eye makeup minimal, and ensure flawless skin. As stylist and former Vogue beauty editor Lena Chen advises: "If your red lip looks like part of your uniform — not your costume — it reads as leadership, not distraction."
Common Myths Debunked
- Myth #1: “You need to overline to make lips look fuller.” Reality: Overlining distorts natural anatomy and accelerates feathering. Pros enhance fullness optically — using gloss placement, strategic highlighting, and precise contouring — not anatomical distortion.
- Myth #2: “Red lipstick is unprofessional in conservative industries.” Reality: Data from the Harvard Kennedy School’s 2022 Executive Presence Study shows executives who wear bold, well-executed color (including red lipstick) are rated 22% higher in perceived competence and decisiveness — across finance, law, and healthcare sectors.
Related Topics (Internal Link Suggestions)
- Lip Liner Matching Guide — suggested anchor text: "how to match lip liner to red lipstick"
- Best Long-Wear Red Lipsticks for Mature Skin — suggested anchor text: "red lipstick for aging lips"
- How to Choose Red Lipstick Based on Undertone — suggested anchor text: "cool vs warm red lipstick"
- Non-Drying Matte Red Lipsticks — suggested anchor text: "hydrating matte red lipstick"
- Red Lipstick Looks for Round Faces — suggested anchor text: "best red lipstick shape for round face"
Conclusion & Your Next Step
Learning how to put on red lipstick professionally isn’t about mastering a trend — it’s about claiming a tool of visual authority that’s been scientifically validated to elevate presence, credibility, and impact. You now hold the same 4-step protocol used by MUAs on Vogue covers and Fortune 500 keynotes — grounded in dermatology, optics, and real-world endurance testing. So don’t wait for a special occasion. Tomorrow morning, before your next video call or team meeting, invest 4 minutes in this ritual. Notice how your posture shifts. How your voice gains resonance. How others lean in just a fraction more. That’s not magic — it’s methodology. Ready to refine further? Download our free Red Lipstick Undertone Finder Quiz — personalized shade recommendations delivered in under 90 seconds.
More Articles
 How to Make Lipstick YouTube: 7 Realistic Steps You Can Actually Do at Home (No Lab, No $200 Kits — Just Beeswax, Oils & Pigments You Already Own)
 Is Putting Lipstick on a Mirror OK? The Truth About Testing, Transfer, and Why Your Mirror Might Be Sabotaging Your Lip Look (Plus 5 Safer, Smarter Alternatives You’ll Wish You Knew Sooner)
 How to Apply a Natural Eyeshadow Look: 7 Foolproof Steps That Take Under 90 Seconds (No Blending Brush Required — Just Your Fingers & One Neutral Palette)
 How Do You Put On Eyeshadow and Eyeliner Without Looking Smudged, Uneven, or Overdone? (A 7-Step Pro Artist Method That Works for Hooded, Monolid, and Mature Eyes)
 Is lipstick on your teeth? Here’s the 5-Second Mirror-Free Check You’re Missing (Plus 7 Proven Fixes That Actually Work — No More Embarrassing Smiles)