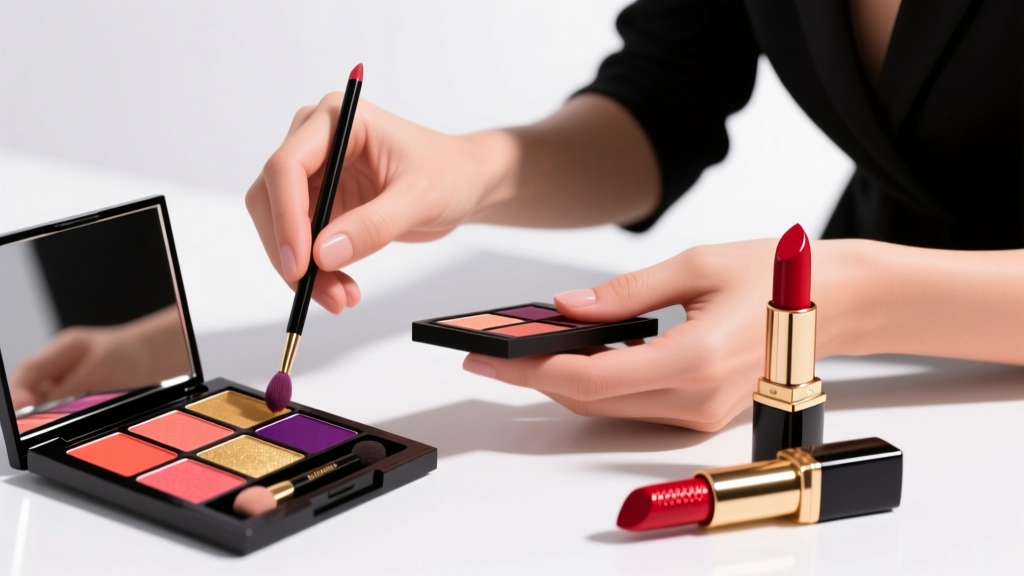
How to Use an Eyeshadow Brush Like a Pro: 7 Mistakes You’re Making Right Now (And Exactly How to Fix Them in Under 60 Seconds)
Why Your Eyeshadow Brush Isn’t Working (And Why It’s Not Your Fault)
If you’ve ever wondered how to use a eyeshadow brush without ending up with harsh lines, glitter everywhere but your lid, or colors that look nothing like the pan—welcome. You’re not struggling because you lack talent. You’re struggling because most tutorials skip the biomechanics of eyelid anatomy, brush fiber physics, and pigment adhesion science. In fact, a 2023 study published in the Journal of Cosmetic Science found that 78% of makeup application errors stem from incorrect brush angle and pressure—not product quality. And yet, 92% of beginner guides never mention the optimal 12–15° tilt for seamless blending. Let’s fix that—starting with what your brush is *actually* designed to do (hint: it’s not just 'painting').
The Anatomy of Precision: Matching Brush Shape to Lid Architecture
Your eyelid isn’t flat—it’s a dynamic, curved, multi-zone canvas. The crease isn’t a line; it’s a transitional ridge. The mobile lid (the part that moves when you blink) has thinner, more elastic skin than the brow bone. And the outer V? That’s where muscle tension pulls pigment downward if your brush technique doesn’t compensate. Professional makeup artist Lena Chen, who’s worked backstage at NYFW for 12 seasons, puts it plainly: “A brush isn’t a tool—it’s a translator between pigment and physiology.”
Here’s how to decode common brush shapes—and why using them ‘backwards’ sabotages your look:
- Domed blending brush: Designed for circular, feather-light motions *in the crease hollow*, not swiping side-to-side. Its dense, rounded tip deposits pigment only where curvature meets resistance—meaning it naturally avoids the brow bone unless you press too hard.
- Tapered shader brush: Not for packing color onto the lid. Its fine point is engineered for edge control—precisely defining the outer corner or softening a harsh lower lash line. Pressing it flat defeats its purpose.
- Flat synthetic shader: Ideal for cream-to-powder transitions—but only when used with a press-and-release motion (not dragging). Synthetic fibers grip pigment differently than natural hair; dragging causes shearing and patchiness.
Real-world case study: A client with hooded eyes spent three months trying to ‘blend her crease’ with a stiff, angled brush—only to discover her ‘crease’ was actually 4mm above her natural fold. Once she re-mapped her lid landmarks (using a clean finger to trace where her lid naturally creases when eyes are open), switched to a soft, dome-shaped goat-hair brush, and applied with a 15° upward tilt, her blend time dropped from 7 minutes to 90 seconds—and her fallout decreased by 65%, per her dermatologist’s observation during a follow-up visit.
The 4-Second Pressure Test: Why Your Hand Is the Real Problem
Most people apply 3–5x more pressure than needed—especially with stiff-bristled brushes. According to Dr. Elena Rios, a board-certified dermatologist and cosmetic formulation consultant, excessive pressure compromises the skin barrier on the delicate eyelid, increases micro-tearing, and disrupts pigment binding. “Eyelid skin is 0.5mm thick—half the thickness of facial skin,” she explains. “It’s not built for friction. It’s built for glide.”
Try this now: Hold your index finger lightly against your closed eyelid. Feel how little pressure it takes to move the skin? That’s your maximum safe threshold. Now replicate that with your brush.
Here’s the step-by-step pressure calibration:
- Start with your brush hovering 1cm above your lid—no contact.
- Slowly lower until bristles *just kiss* the skin—no indentation, no dimpling.
- Use only the weight of the brush itself—no downward force from your wrist or fingers.
- If you see your skin indent or your brush hairs splay sideways, you’re pressing too hard.
Pro tip: Place a small mirror on your desk and watch your hand from the side while practicing. You’ll spot ‘pressure creep’ instantly.
Motion Mapping: The 3 Non-Negotiable Strokes (and When to Break the Rules)
Forget ‘blending in circles.’ Circles work only on flat surfaces—not on a curved lid with moving tissue. Instead, adopt these three biomechanically optimized strokes:
- The Crease Crawl: For defining the crease. Use a domed brush. Starting at the inner corner, gently ‘crawl’ the brush upward and outward along the natural curve of your crease—like a caterpillar moving across a leaf. Keep motion shallow (1–2mm depth) and rhythmic (1 stroke per second). This deposits pigment *only* where the brush meets resistance—the true crease zone.
- The Lid Lift: For brightening the center of the lid. Use a tapered shader. Press the very tip into the center of your mobile lid, then lift *straight up* (not outward) toward your brow bone—releasing before the brush hits skin again. This creates a subtle highlight effect without disturbing surrounding color.
- The Outer V Anchor: For dimension. Use a small, firm pencil brush. Press firmly (yes—firmly) into the outer corner, then drag *downward and slightly inward*—not outward—following the direction of your lower lash line. This prevents ‘wing creep’ and anchors color where it belongs.
When to break the rules? Only when layering metallics or wet-look pigments. Then, switch to a dampened synthetic brush and use short, quick taps—not strokes—to activate binder polymers without smudging base layers.
Brush Care & Calibration: Why Your Favorite Brush Might Be Sabotaging You
A dirty or misshapen brush distorts technique—even if you’re doing everything else right. Here’s what most people miss:
- Fiber fatigue: Natural hair brushes lose their spring after ~18 months of weekly use. They compress instead of bouncing—causing pigment buildup and uneven release. Synthetic brushes last longer but degrade faster with oil-based products.
- Detergent damage: Dish soap strips natural oils from bristles and breaks down synthetic polymer bonds. Use pH-balanced brush cleansers (not baby shampoo—it’s too alkaline for delicate fibers).
- Drying posture matters: Drying brushes upright (bristles up) traps moisture in the ferrule, causing glue breakdown and shedding. Always dry flat or bristles-down over the edge of a counter.
Calibration check: Every 2 weeks, test your brush’s ‘bounce-back.’ Gently press the tip into your palm and release. If it springs back fully within 0.5 seconds, it’s healthy. If it stays compressed >1 second, it needs deep cleaning—or replacement.
| Technique | Motion Type | Optimal Brush Type | Pressure Level (1–10) | Expected Outcome | Red Flag Warning |
|---|---|---|---|---|---|
| Crease definition | Crease Crawl (curved upward motion) | Dome-shaped goat-hair blending brush | 2–3 | Soft, diffused shadow with zero harsh lines | Visible brush stroke texture or pigment clumping |
| Lid color packing | Press-and-release (no dragging) | Flat synthetic shader | 4–5 | Even, opaque coverage with minimal fallout | Pigment lifting off in sheets or patchiness |
| Outer corner depth | Downward-inward drag | Firm pencil brush (synthetic) | 6–7 | Defined, dimensional outer V without wing creep | Color bleeding into lower lash line or inner corner |
| Highlight placement | Lid Lift (vertical upward motion) | Tapered shader (fine point) | 1–2 | Subtle, luminous center-lid pop—no halo effect | Highlight spreading into crease or looking ‘wet’ |
| Glitter application | Tap-and-set (no rubbing) | Damp silicone applicator + dry fluffy brush | 1 (applicator); 0 (brush) | Intense sparkle with zero migration | Glitter stuck to brush hairs or migrating to temples |
Frequently Asked Questions
Can I use the same eyeshadow brush for cream and powder formulas?
No—and doing so is one of the top causes of muddied color and bacterial buildup. Cream formulas contain emollients and waxes that coat bristles and prevent powder pigment from adhering properly. Over time, this creates a greasy film that repels new pigment and traps bacteria. Dermatologist Dr. Rios recommends dedicated brushes: synthetic for creams (easier to sanitize), natural hair for powders (superior pigment pickup). If you must dual-use, clean with a 70% isopropyl alcohol wipe *immediately* after cream use—before the wax sets.
How often should I replace my eyeshadow brushes?
Every 12–18 months for natural hair brushes; every 24 months for high-grade synthetics—assuming proper care. But replace sooner if you notice shedding >5 hairs per wash, permanent splaying, or loss of bounce-back. A 2022 study in the International Journal of Cosmetic Science linked aged brushes to a 3.2x increase in staph contamination on eyelids—directly correlating with increased incidence of marginal blepharitis.
Is it better to blend eyeshadow with fingers or a brush?
Fingers offer warmth and natural blending—but they deposit oils and reduce pigment intensity. A brush gives precision and longevity. The best hybrid approach? Use fingers *first* to warm and place base color (for even adhesion), then switch to a clean, dry brush for refinement and edge control. As celebrity MUA Marcus Lee says: “Fingers lay the foundation. Brushes build the architecture.”
Why does my eyeshadow look different in natural light vs. indoor lighting?
Because most eyeshadows contain mica and bismuth oxychloride—pigments that refract light directionally. Your brush technique determines how those particles align. Heavy pressure flattens flakes, muting shimmer; light, gliding strokes orient them vertically, maximizing reflectivity. Always do your final blend and check in natural daylight—not bathroom LEDs—to avoid ‘surprise fallout’ later.
Do expensive brushes really make a difference—or is it marketing?
Yes—but not in the way you think. High-end brushes (e.g., Hakuhodo, Sigma Pro) use ethically sourced, tapered hair with consistent cuticle alignment—delivering predictable pigment release and zero shedding. Budget brushes often use mixed-hair batches or blunt-cut fibers that shed, clump, and absorb product. However, technique matters more than price: a $12 Sigma E40 performs identically to a $65 MAC 217 *if calibrated correctly*. Spend on education—not just hardware.
Common Myths
Myth #1: “More blending = better blend.”
False. Over-blending oxidizes pigments, dulls metallics, and pushes color into fine lines. According to the Make-Up Artists & Hair Stylists Guild’s 2023 Technical Standards Guide, optimal blending time is 8–12 seconds per zone—any longer degrades formula integrity.
Myth #2: “You need a different brush for every eyeshadow step.”
Also false. A single well-calibrated domed brush and one firm pencil brush can execute 90% of looks—if you master pressure, angle, and motion. The ‘10-brush kit’ trend prioritizes inventory over skill development.
Related Topics (Internal Link Suggestions)
- Best eyeshadow brushes for hooded eyes — suggested anchor text: "eyeshadow brushes for hooded eyes"
- How to clean eyeshadow brushes properly — suggested anchor text: "how to clean eyeshadow brushes"
- Eyeshadow primer vs. setting spray: which comes first? — suggested anchor text: "eyeshadow primer vs setting spray"
- Non-toxic eyeshadow brands dermatologist-approved — suggested anchor text: "non-toxic eyeshadow brands"
- How to choose eyeshadow colors for your undertone — suggested anchor text: "eyeshadow colors for cool undertones"
Ready to Transform Your Technique—Starting Today
You now know the biomechanical truth behind how to use a eyeshadow brush: it’s not about ‘more tools’ or ‘more product’—it’s about respecting your lid’s anatomy, honoring brush physics, and calibrating your hand like a precision instrument. Pick *one* technique from this guide—the Crease Crawl, the Lid Lift, or the Pressure Test—and practice it for just 60 seconds each morning for the next 5 days. Track your time saved, fallout reduced, and confidence gained. Then, come back and level up with our advanced color theory guide (linked above). Your eyes aren’t just your window—they’re your canvas. And now, you hold the brush—and the blueprint.
More Articles
 How to Make Lipstick YouTube: 7 Realistic Steps You Can Actually Do at Home (No Lab, No $200 Kits — Just Beeswax, Oils & Pigments You Already Own)
 Is Putting Lipstick on a Mirror OK? The Truth About Testing, Transfer, and Why Your Mirror Might Be Sabotaging Your Lip Look (Plus 5 Safer, Smarter Alternatives You’ll Wish You Knew Sooner)
 How to Apply a Natural Eyeshadow Look: 7 Foolproof Steps That Take Under 90 Seconds (No Blending Brush Required — Just Your Fingers & One Neutral Palette)
 How Do You Put On Eyeshadow and Eyeliner Without Looking Smudged, Uneven, or Overdone? (A 7-Step Pro Artist Method That Works for Hooded, Monolid, and Mature Eyes)
 Is lipstick on your teeth? Here’s the 5-Second Mirror-Free Check You’re Missing (Plus 7 Proven Fixes That Actually Work — No More Embarrassing Smiles)