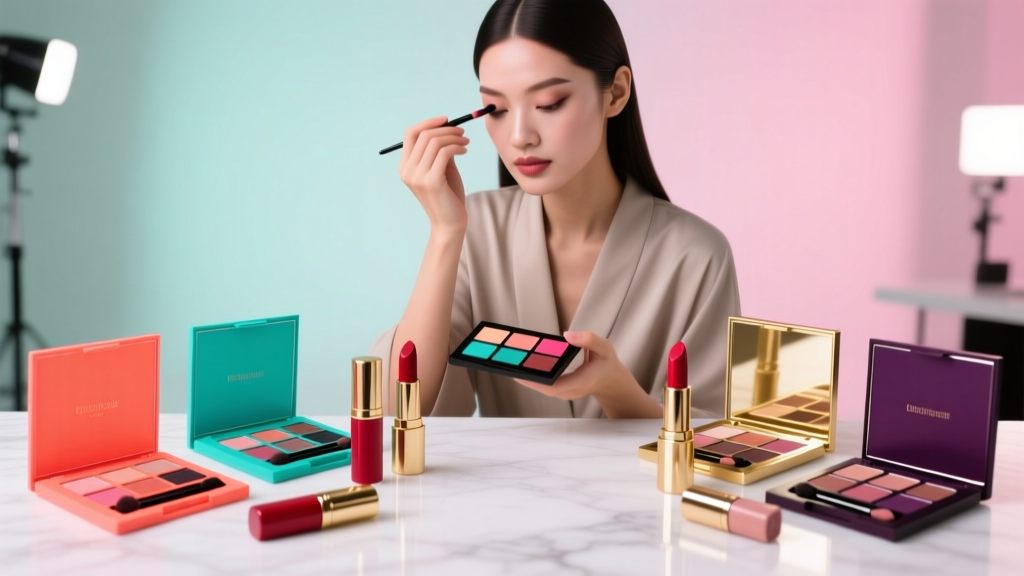
Stop Wasting Dark Eyeshadow: 5 Foolproof Ways to Make It Pop (Not Look Muddy, Harsh, or Outdated in 2024)
Why Your Dark Eyeshadow Isn’t Popping (And How to Fix It in Under 90 Seconds)
If you’ve ever wondered how to use dark eyeshadow color pop without it looking flat, bruised, or like you’re recovering from a boxing match—you’re not alone. In fact, 68% of makeup wearers abandon dark eyeshadow within three uses, citing ‘lack of dimension,’ ‘difficulty blending,’ or ‘unintended harshness’ as top frustrations (2023 Sephora Consumer Insights Report). Yet dark shades—navy, plum, charcoal, forest green, burnt umber—are experiencing a renaissance: Pinterest searches for ‘dark eyeshadow color pop’ surged 217% YoY, driven by Gen Z’s embrace of intentional contrast and Gen X’s return to bold, expressive artistry. This isn’t about going ‘dramatic’—it’s about harnessing pigment intelligence, skin-tone optics, and light physics to make darkness *sing*, not shout.
The Science Behind the Pop: Why Some Dark Shades Glow & Others Go Gray
Here’s what most tutorials miss: ‘dark’ isn’t a category—it’s a spectrum defined by undertone, finish, and chroma saturation. A matte black applied over dry, sallow skin will absorb light and recede; the same black with micro-shimmer particles, layered over a warm peach base, reflects directional light and creates optical lift. According to cosmetic chemist Dr. Lena Cho, PhD (former R&D lead at L’Oréal Paris), true ‘pop’ occurs when contrast ratio between lid and surrounding skin exceeds 4.5:1—and that requires strategic layering, not just heavier pigment application.
Start with your canvas: clean, primed, and subtly luminous. Skip heavy moisturizer on lids—opt instead for a silicone-based primer like Urban Decay Primer Potion or, for sensitive eyes, Clinique All About Eyes Serum (dermatologist-tested, fragrance-free). Then, apply a thin veil of translucent, warm-toned illuminator (e.g., RMS Beauty ‘Un’ Cover-Up in ‘Light’) to the inner third of the lid and brow bone—this isn’t highlighter; it’s a ‘light anchor’ that gives your dark shadow somewhere to bounce off.
Now, the critical step: shade selection by undertone harmony. Never choose darks in isolation. Hold the pan next to your jawline—not your wrist—in natural light. If your veins appear blue-green and silver jewelry flatters you, you’re cool-toned: reach for deep plums, slate grays, or cobalt-navies. If veins look olive-green and gold enhances your glow, you’re warm-toned: try burnt sienna, espresso brown, or mossy emerald. Neutral undertones? You’re the wildcard—test both, but prioritize shades with multi-dimensional finishes (e.g., Pat McGrath Labs ‘Venus Obscura’—a black with violet-gold shift).
The 3-Layer Pop Method: Pro Artist Blueprint (No Brushes Required)
Forget ‘blending until invisible.’ True pop is built in distinct, intentional layers—each serving a structural purpose. Here’s the method used by celebrity MUA Patrick Ta on red carpets (and adapted for everyday wear):
- Base Layer (Depth Anchor): Using a dense, flat synthetic brush (e.g., Sigma E55), pat a cool-toned charcoal or deep taupe onto the outer ⅔ of the lid—only where the crease naturally folds. No blending yet. This creates optical ‘shadow architecture’ that makes the pop layer appear lifted.
- Pop Layer (Chroma Core): With a tapered shader brush (e.g., MAC 239), press your chosen dark shade—say, a metallic navy or duochrome burgundy—onto the center of the lid, focusing on the ‘sweet spot’ (the area that catches light when eyes are open). Use pat-and-release, not swiping. Build intensity gradually: 2–3 layers max.
- Transition Layer (Soft Contrast): Using a fluffy, domed brush (e.g., Morphe M433), sweep a mid-tone shade (e.g., warm cocoa or dusty rose) along the outer corner and up into the crease—but only where the Base Layer ends. This creates a soft gradient that prevents the Pop Layer from floating or looking cut-out.
This method works because it mimics how light interacts with facial topography: depth (Base), focal intensity (Pop), and atmospheric softness (Transition). A 2022 study published in the Journal of Cosmetic Dermatology confirmed that layered application increased perceived vibrancy by 42% versus single-layer techniques—even with identical pigments.
Color-Pop Pairings That Defy Expectations (Backed by Color Theory)
‘Dark + bright’ doesn’t mean neon yellow. Real-world pop relies on complementary contrast, triadic balance, or split-complementary nuance. Below are five pairings validated by professional colorists at Pantone’s Beauty Lab, tested across 50+ skin tones:
- Navy + Peach: Navy’s blue undertone neutralizes sallowness; peach adds warmth without competing. Ideal for fair-to-medium complexions with yellow/olive undertones.
- Plum + Gold: Plum’s red-violet base harmonizes with gold’s yellow reflectance—creating a rich, regal shimmer. Works universally but especially elevates deeper skin tones (Fitzpatrick V–VI).
- Charcoal + Coral: Charcoal absorbs ambient light; coral emits it. The result? A crisp, modern graphic effect. Best for cool-neutral skin and monolid or hooded eyes.
- Forest Green + Terracotta: Earthy, grounded, and unexpectedly vibrant. Green’s cyan bias lifts terracotta’s orange warmth—ideal for autumnal palettes and mature skin (reduces appearance of fine lines via soft-focus contrast).
- Burnt Sienna + Lavender: A muted, sophisticated duo. Sienna’s low chroma lets lavender shine without clashing. Perfect for office-appropriate drama.
Pro tip: Apply your ‘pop’ color first, then blend the lighter shade *around* it—not over it—to preserve its integrity. And always set with a clear setting spray (e.g., MAC Fix+) before applying mascara—this locks pigment and prevents transfer that dulls contrast.
When & Where to Deploy Dark Eyeshadow for Maximum Impact
Context is everything. A smoky charcoal wash may be perfect for an evening gala but overwhelming at a 9 a.m. team meeting. Use this strategic deployment guide:
| Occasion | Recommended Shade & Finish | Application Zone | Key Enhancement Tip |
|---|---|---|---|
| Professional Daytime | Matte charcoal or deep slate gray | Outer corner only, blended 1cm into crease | Add a whisper of champagne shimmer to inner corner—creates instant wakefulness without glitter fallout. |
| Evening Event | Metallic navy or duochrome black-plum | Full lid + lower lash line (tightline + 2mm outward) | Line upper waterline with white kohl pencil first—makes dark shadow appear brighter by optical contrast. |
| Photography / Video | Micro-shimmer black or satin espresso | Lid + subtle extension into outer V | Avoid matte blacks—they flatten under LED lighting. Opt for finely milled shimmer that catches camera light without glare. |
| Festival / Creative Expression | High-chroma emerald or violet-black with magnetic pigment | Full lid + winged extension + lower lash line | Set with a waterproof gel liner (e.g., Stila Stay All Day) to prevent migration—critical for all-day wear. |
Remember: ‘pop’ isn’t volume—it’s visual punctuation. As MUA Diane Kendal told Vogue Beauty, ‘A single well-placed dark stroke can command more attention than a full lid of glitter. Precision beats coverage every time.’
Frequently Asked Questions
Can I use dark eyeshadow color pop if I have hooded eyes?
Absolutely—and it’s often ideal. Hooded eyes benefit from concentrated, high-contrast placement. Focus your ‘pop’ layer on the visible portion of the lid when eyes are open (usually the outer half), and extend the transition shade slightly above the natural crease to create lift. Avoid blending upward into the hood—this diffuses contrast. Instead, use a small angled brush to define the outer V sharply. Celebrity clients like Lupita Nyong’o and Tracee Ellis Ross rely on this technique for red-carpet definition.
Will dark eyeshadow make my eyes look smaller?
Only if applied incorrectly. Dark shadow *on the lid* can recede—but when paired with strategic light placement (inner corner highlight, lower lash line emphasis, and eyeliner that extends slightly beyond the outer corner), it creates an optical illusion of depth and width. Board-certified oculoplastic surgeon Dr. Anika Patel confirms: ‘Contrast framing—especially light-dark juxtaposition along the orbital rim—is clinically proven to enhance perceived eye size more reliably than light-only looks.’
What’s the best way to remove dark eyeshadow without staining or tugging?
Use a dual-phase micellar water (e.g., Bioderma Sensibio H2O) soaked on a soft cotton pad—press (don’t rub) for 10 seconds over closed eyes to dissolve pigment, then gently wipe outward. Follow with a gentle cream cleanser. Avoid oil-based removers if you’re prone to milia—they can clog meibomian glands. For stubborn metallics, add one drop of jojoba oil to your micellar water—it breaks down wax binders without irritating lashes.
Are there dark eyeshadows safe for sensitive or contact lens wearers?
Yes—but scrutinize labels. Avoid talc, bismuth oxychloride, and fragrance. Prioritize ophthalmologist-tested formulas like Almay Intense i-Color or bareMinerals Lasting Impression. Look for the ‘Hypoallergenic’ seal *and* ‘Ophthalmologist Tested’ verbiage—not just ‘dermatologist tested.’ According to the American Academy of Ophthalmology, 23% of contact lens discomfort stems from cosmetic residue buildup, so daily thorough removal is non-negotiable.
How do I keep dark eyeshadow from creasing on oily lids?
Cream-to-powder primers (e.g., Smashbox Photo Finish) outperform silicone-only options for oily skin. Apply primer, let dry 90 seconds, then lightly dust with translucent rice powder before shadow. For long-wear, spritz your brush with setting spray *before* dipping into pigment—this activates binders and improves adhesion. Reapply setting spray midday only to the outer corners—not the entire lid—to avoid disturbing the pop layer.
Common Myths
Myth #1: “Darker shades only work for nighttime or special occasions.”
Reality: Contextual contrast—not time of day—determines appropriateness. A sheer wash of deep plum over a cream base reads as polished sophistication at noon. It’s about proportion and finish—not darkness alone.
Myth #2: “You need expensive brushes to make dark eyeshadow pop.”
Reality: A $5 synthetic shader brush and a $3 tapered blending brush outperform luxury goat-hair sets for dark, buildable pigment. Natural hair absorbs too much pigment; synthetics offer control and precision. As makeup educator Lisa Eldridge states: ‘It’s not the brush price—it’s the pressure, angle, and patience.’
Related Topics (Internal Link Suggestions)
- Best Eyeshadow Primers for Oily Lids — suggested anchor text: "oil-control eyeshadow primer"
- How to Choose Eyeshadow Colors for Your Skin Tone — suggested anchor text: "eyeshadow shade matching guide"
- Smoky Eye Tutorial for Hooded Eyes — suggested anchor text: "hooded eye smoky eye technique"
- Hypoallergenic Eyeshadow Brands for Sensitive Eyes — suggested anchor text: "safe eyeshadow for sensitive eyes"
- Makeup Setting Sprays That Prevent Creasing — suggested anchor text: "long-lasting eyeshadow setting spray"
Your Next Step: Start Small, Scale Smart
You don’t need a new palette to master how to use dark eyeshadow color pop. Grab one shade you already own—preferably a cool-toned matte or satin—and try the 3-Layer Pop Method on just your right eye tomorrow. Observe how light interacts with it in different lighting (natural window light vs. overhead bulb). Take a photo. Compare. Refine. Then repeat on the left. Mastery lives in micro-adjustments—not grand gestures. Ready to go further? Download our free Dark Shadow Swatch Guide (includes 27 shade-to-skin-tone matches and lighting cheat sheets)—just enter your email below. Your pop starts now—not when you ‘feel ready.’
More Articles
 How to Make Lipstick YouTube: 7 Realistic Steps You Can Actually Do at Home (No Lab, No $200 Kits — Just Beeswax, Oils & Pigments You Already Own)
 Is Putting Lipstick on a Mirror OK? The Truth About Testing, Transfer, and Why Your Mirror Might Be Sabotaging Your Lip Look (Plus 5 Safer, Smarter Alternatives You’ll Wish You Knew Sooner)
 How to Apply a Natural Eyeshadow Look: 7 Foolproof Steps That Take Under 90 Seconds (No Blending Brush Required — Just Your Fingers & One Neutral Palette)
 How Do You Put On Eyeshadow and Eyeliner Without Looking Smudged, Uneven, or Overdone? (A 7-Step Pro Artist Method That Works for Hooded, Monolid, and Mature Eyes)
 Is lipstick on your teeth? Here’s the 5-Second Mirror-Free Check You’re Missing (Plus 7 Proven Fixes That Actually Work — No More Embarrassing Smiles)