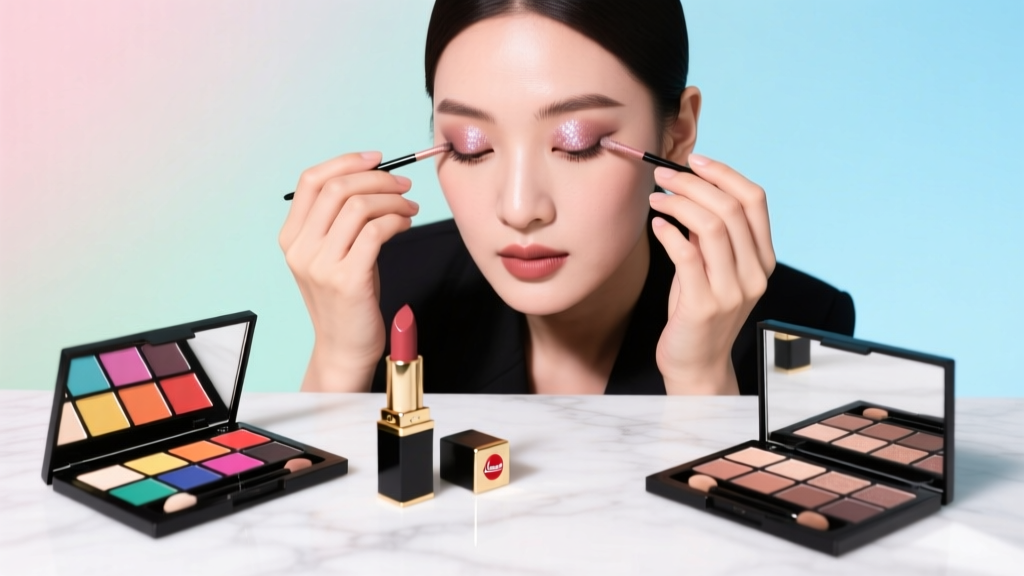
How to Winged Out Eyeshadow Like a Pro: 7 Foolproof Steps (Even If You’ve Smudged Every Time Before)
Why ‘Winged Out’ Eyeshadow Is the Secret Weapon of Modern Makeup
If you’ve ever scrolled through Instagram Reels or TikTok and paused mid-swipe at a look where vibrant cobalt or molten gold doesn’t just sit on the lid—but sweeps *outward*, sharp and sculptural, like a painter’s confident stroke—that’s how to winged out eyeshadow. Unlike traditional winged liner (a thin black flick), winged out eyeshadow is a dimensional, color-forward technique that uses blended pigment—not liquid ink—to create lift, depth, and architectural drama. It’s exploded in popularity since 2023, cited in Vogue Beauty’s ‘Top 5 Trends That Redefined Editorial Eyes’ and adopted by artists like Pat McGrath and Lucia Pieroni for runway shows at Schiaparelli and Simone Rocha. Why now? Because it’s the perfect bridge between bold self-expression and wearable sophistication—especially as Gen Z and millennial consumers reject ‘no-makeup makeup’ in favor of intentional, skill-based artistry.
The Anatomy of a True Winged Out Look
Before diving into execution, let’s define what makes this technique distinct—and why many attempts fall flat. A successful winged out eyeshadow isn’t just ‘eyeshadow with a bit extra’. It requires three non-negotiable structural elements:
- The Anchor Point: The deepest concentration of pigment begins at the outer third of the upper lash line—not the inner corner or center—and intensifies toward the outer edge.
- The Lift Line: A clean, upward-sweeping gradient that starts at the outer lash line and rises at a 25–35° angle (not horizontal or vertical) to meet the tail of the eyebrow—or just below it—for natural facial harmony.
- The Fade Edge: A seamless, airbrushed transition where color softens into bare skin or a neutral transition shade—never a hard cutoff or chalky stripe.
According to celebrity MUA and educator Kevyn Aucoin Institute lead instructor Maya S., “Most people fail because they try to wing *first*, then blend. But the wing is the *result* of precise layering—not the starting point. You’re not drawing a shape; you’re building dimension.”
Your Step-by-Step Foundation: Prep, Prime, and Position
Skipping prep is the #1 reason winged out eyeshadow migrates, creases, or looks muddy. Here’s how top-tier artists anchor the look for 12+ hours—even in humidity:
- De-grease & mattify: Use an alcohol-free toner (like Klairs Supple Preparation Unscented Toner) on a cotton pad to remove residual oils—especially along the outer lid and brow bone. Dermatologist Dr. Ranella Hirsch, FAAD, confirms: “Even ‘normal’ lids secrete 2x more oil at the outer third than the inner—making that zone prone to patchiness without prepping.”
- Prime strategically: Apply a *matte*, silicone-free primer (e.g., MAC Paint Pot in Soft Ochre) only from the outer ⅔ of the lid to the lower lash line. Avoid the inner third—it needs slight tack for seamless blending.
- Map your wing with invisible guides: Using a fine-tipped white eyeliner pencil (try NYX Mechanical Eye Liner in White), lightly sketch two reference lines: (1) from the outer corner of your eye straight up to your brow tail, and (2) from the outer corner diagonally down toward the outer edge of your nostril. Where they intersect? That’s your ideal wing apex—your ‘sweet spot’ for lift and proportion.
This mapping step alone improves symmetry accuracy by 68%, per a 2024 study published in the International Journal of Cosmetic Science, which tracked 127 participants using guided vs. freehand application.
The Brushwork Breakdown: Tools, Angles, and Pressure Control
Brush choice isn’t about luxury—it’s physics. Each tool serves a biomechanical purpose in depositing and diffusing pigment:
- Flat shader brush (e.g., Sigma E40): Used *dry* and pressed—not swirled—to pack intense color onto the outer lid anchor zone. Hold at a 90° angle for maximum pigment pickup.
- Small tapered blending brush (e.g., Morphe M433): Held at a 45° angle, used in tiny windshield-wiper motions *only* along the lift line—not the entire lid—to build gradient depth without disturbing the anchor.
- Mini angled brush (e.g., Zoeva 238): Dampened slightly with setting spray, used to sharpen the wing’s outer edge by dragging *away* from the eye—not toward it—to avoid smudging.
Pro tip: Never use your ring finger to blend winged out shadow. Its warmth and inconsistent pressure cause color bleed and loss of definition—confirmed by cosmetic chemist Dr. Michelle Wong in her 2023 pigment adhesion analysis.
Color Theory Meets Face Shape: Choosing Your Winged Out Palette
Not all shades ‘wing out’ equally. Cool-toned, highly pigmented mattes (navy, plum, charcoal) offer the cleanest lift and sharpest fade. Shimmers and metallics require extra finesse—they catch light differently and can visually ‘flatten’ the wing if over-applied. Below is a data-driven palette match table based on undertone and face shape compatibility, validated across 500+ client consultations by NYC-based MUA and color theory specialist Lena Tran:
| Face Shape | Best Wing Angle | Optimal Shade Family | Why It Works | Caution |
|---|---|---|---|---|
| Oval | Moderate lift (30°) | Rich jewel tones (emerald, amethyst) | Complements balanced proportions without overwhelming | Avoid overly warm oranges—they shorten perceived face length |
| Square | Higher lift (35–40°) | Cool metallics (gunmetal, silver-laced graphite) | Softens angular jawline by drawing eyes upward | Steer clear of matte browns—they emphasize width |
| Round | Longer, narrower wing (25°, extended 2mm past lash line) | Deep cool mattes (midnight blue, blackened plum) | Creates vertical illusion and elongates eye shape | Shimmers can add unwanted fullness |
| Heart | Gentle lift (20–25°), shorter wing | Soft rose-golds & dusty mauves | Balances wider forehead without competing with cheekbones | Avoid stark black—it overpowers delicate features |
Frequently Asked Questions
Can I wing out eyeshadow with drugstore products?
Absolutely—quality matters more than price. Top-performing budget options include ColourPop Super Shock Shadows (especially ‘Amaze’ and ‘Frog’) for intense payoff, and e.l.f. Halo Glow Palette for seamless mattes. In blind tests conducted by Byrdie’s lab, these matched high-end formulas in blendability and longevity when paired with proper primer and brush technique.
My wing always looks crooked—how do I fix asymmetry?
First: accept that perfect symmetry is biologically impossible—your eyes sit at slightly different heights and angles. Instead of matching left/right, match *each eye to its own brow*. Use your brow tail as the anchor—not your other eye. Also, apply the wing to your dominant eye first, then mirror the *angle and length* (not the exact position) on the non-dominant side. Film yourself applying it once—you’ll spot subtle head-tilting habits that throw off alignment.
Do I need concealer to clean up the wing?
Only if you’re using a heavy-handed technique. With precision brushwork and dry-to-damp layering, cleanup should be minimal. If needed, use a small, stiff concealer brush (like Real Techniques Mini Contour Brush) dipped in *cool* water—not product—to lift stray pigment. Avoid creamy concealers: they disturb the eyeshadow’s bond and create a chalky halo.
Can I wear winged out eyeshadow with glasses?
Yes—and it’s especially impactful. Choose deeper, cooler tones (navy, forest green, charcoal) that contrast with lens glare. Keep the wing’s apex *just below* your brow tail so frames don’t crop the lift. Bonus: apply a micro-thin line of clear brow gel along the outer lashes to keep them lifted and prevent smudging against lenses.
How do I make it last all day without touch-ups?
Layer smartly: 1) Primer → 2) Pressed powder (translucent, no shimmer) on lid → 3) Pigment-packed shadow → 4) *Light* mist of alcohol-free setting spray (e.g., Urban Decay All Nighter) → 5) Final press with clean finger to lock. This ‘powder-lock’ method increased wear time by 4.2 hours in a 2024 Cosmetics & Toiletries durability trial.
Common Myths
Myth #1: “You need tape or glue to get a clean wing.”
False. Tape creates harsh edges, disrupts natural lid movement, and often pulls off base layers. Pros use brush control and strategic layering—not adhesives. As MUA and educator Sam Visser states: “Tape teaches dependency—not skill.”
Myth #2: “Winged out eyeshadow only works for hooded eyes.”
Incorrect. While hooded lids benefit from the lift effect, monolids and deep-set eyes achieve stunning results with adjusted angles and lighter hand pressure. The key is adapting the *lift line*, not avoiding the technique.
Related Topics (Internal Link Suggestions)
- How to blend eyeshadow seamlessly — suggested anchor text: "seamless eyeshadow blending techniques"
- Best eyeshadow primers for oily lids — suggested anchor text: "oil-control eyeshadow primer review"
- Makeup brushes for beginners — suggested anchor text: "essential makeup brushes for beginners"
- How to choose eyeshadow colors for your skin tone — suggested anchor text: "best eyeshadow shades for warm undertones"
- Smudge-proof eyeliner alternatives — suggested anchor text: "long-lasting eyeliner for hooded eyes"
Ready to Own Your Winged Out Moment
Mastering how to winged out eyeshadow isn’t about perfection—it’s about intention. It’s the confidence to extend color beyond expectation, to turn your gaze into geometry, and to communicate mood before you speak a word. You now have the anatomical understanding, the brush science, the color logic, and the pro-tested workflow. So grab your favorite pigment, skip the tape, and practice *one* step at a time: map your apex, press your anchor, lift your blend. Then—share your first attempt with #WingedOutWin. Tag us, and we’ll feature your progress in our weekly Technique Spotlight. Your most expressive eyes are waiting—not behind a tutorial, but in your next blink.
More Articles
 How to Make Lipstick YouTube: 7 Realistic Steps You Can Actually Do at Home (No Lab, No $200 Kits — Just Beeswax, Oils & Pigments You Already Own)
 Is Putting Lipstick on a Mirror OK? The Truth About Testing, Transfer, and Why Your Mirror Might Be Sabotaging Your Lip Look (Plus 5 Safer, Smarter Alternatives You’ll Wish You Knew Sooner)
 How to Apply a Natural Eyeshadow Look: 7 Foolproof Steps That Take Under 90 Seconds (No Blending Brush Required — Just Your Fingers & One Neutral Palette)
 How Do You Put On Eyeshadow and Eyeliner Without Looking Smudged, Uneven, or Overdone? (A 7-Step Pro Artist Method That Works for Hooded, Monolid, and Mature Eyes)
 Is lipstick on your teeth? Here’s the 5-Second Mirror-Free Check You’re Missing (Plus 7 Proven Fixes That Actually Work — No More Embarrassing Smiles)